
Photo Tips from the Pros Series: Jordan Holden

Image & text: Jordan Holden
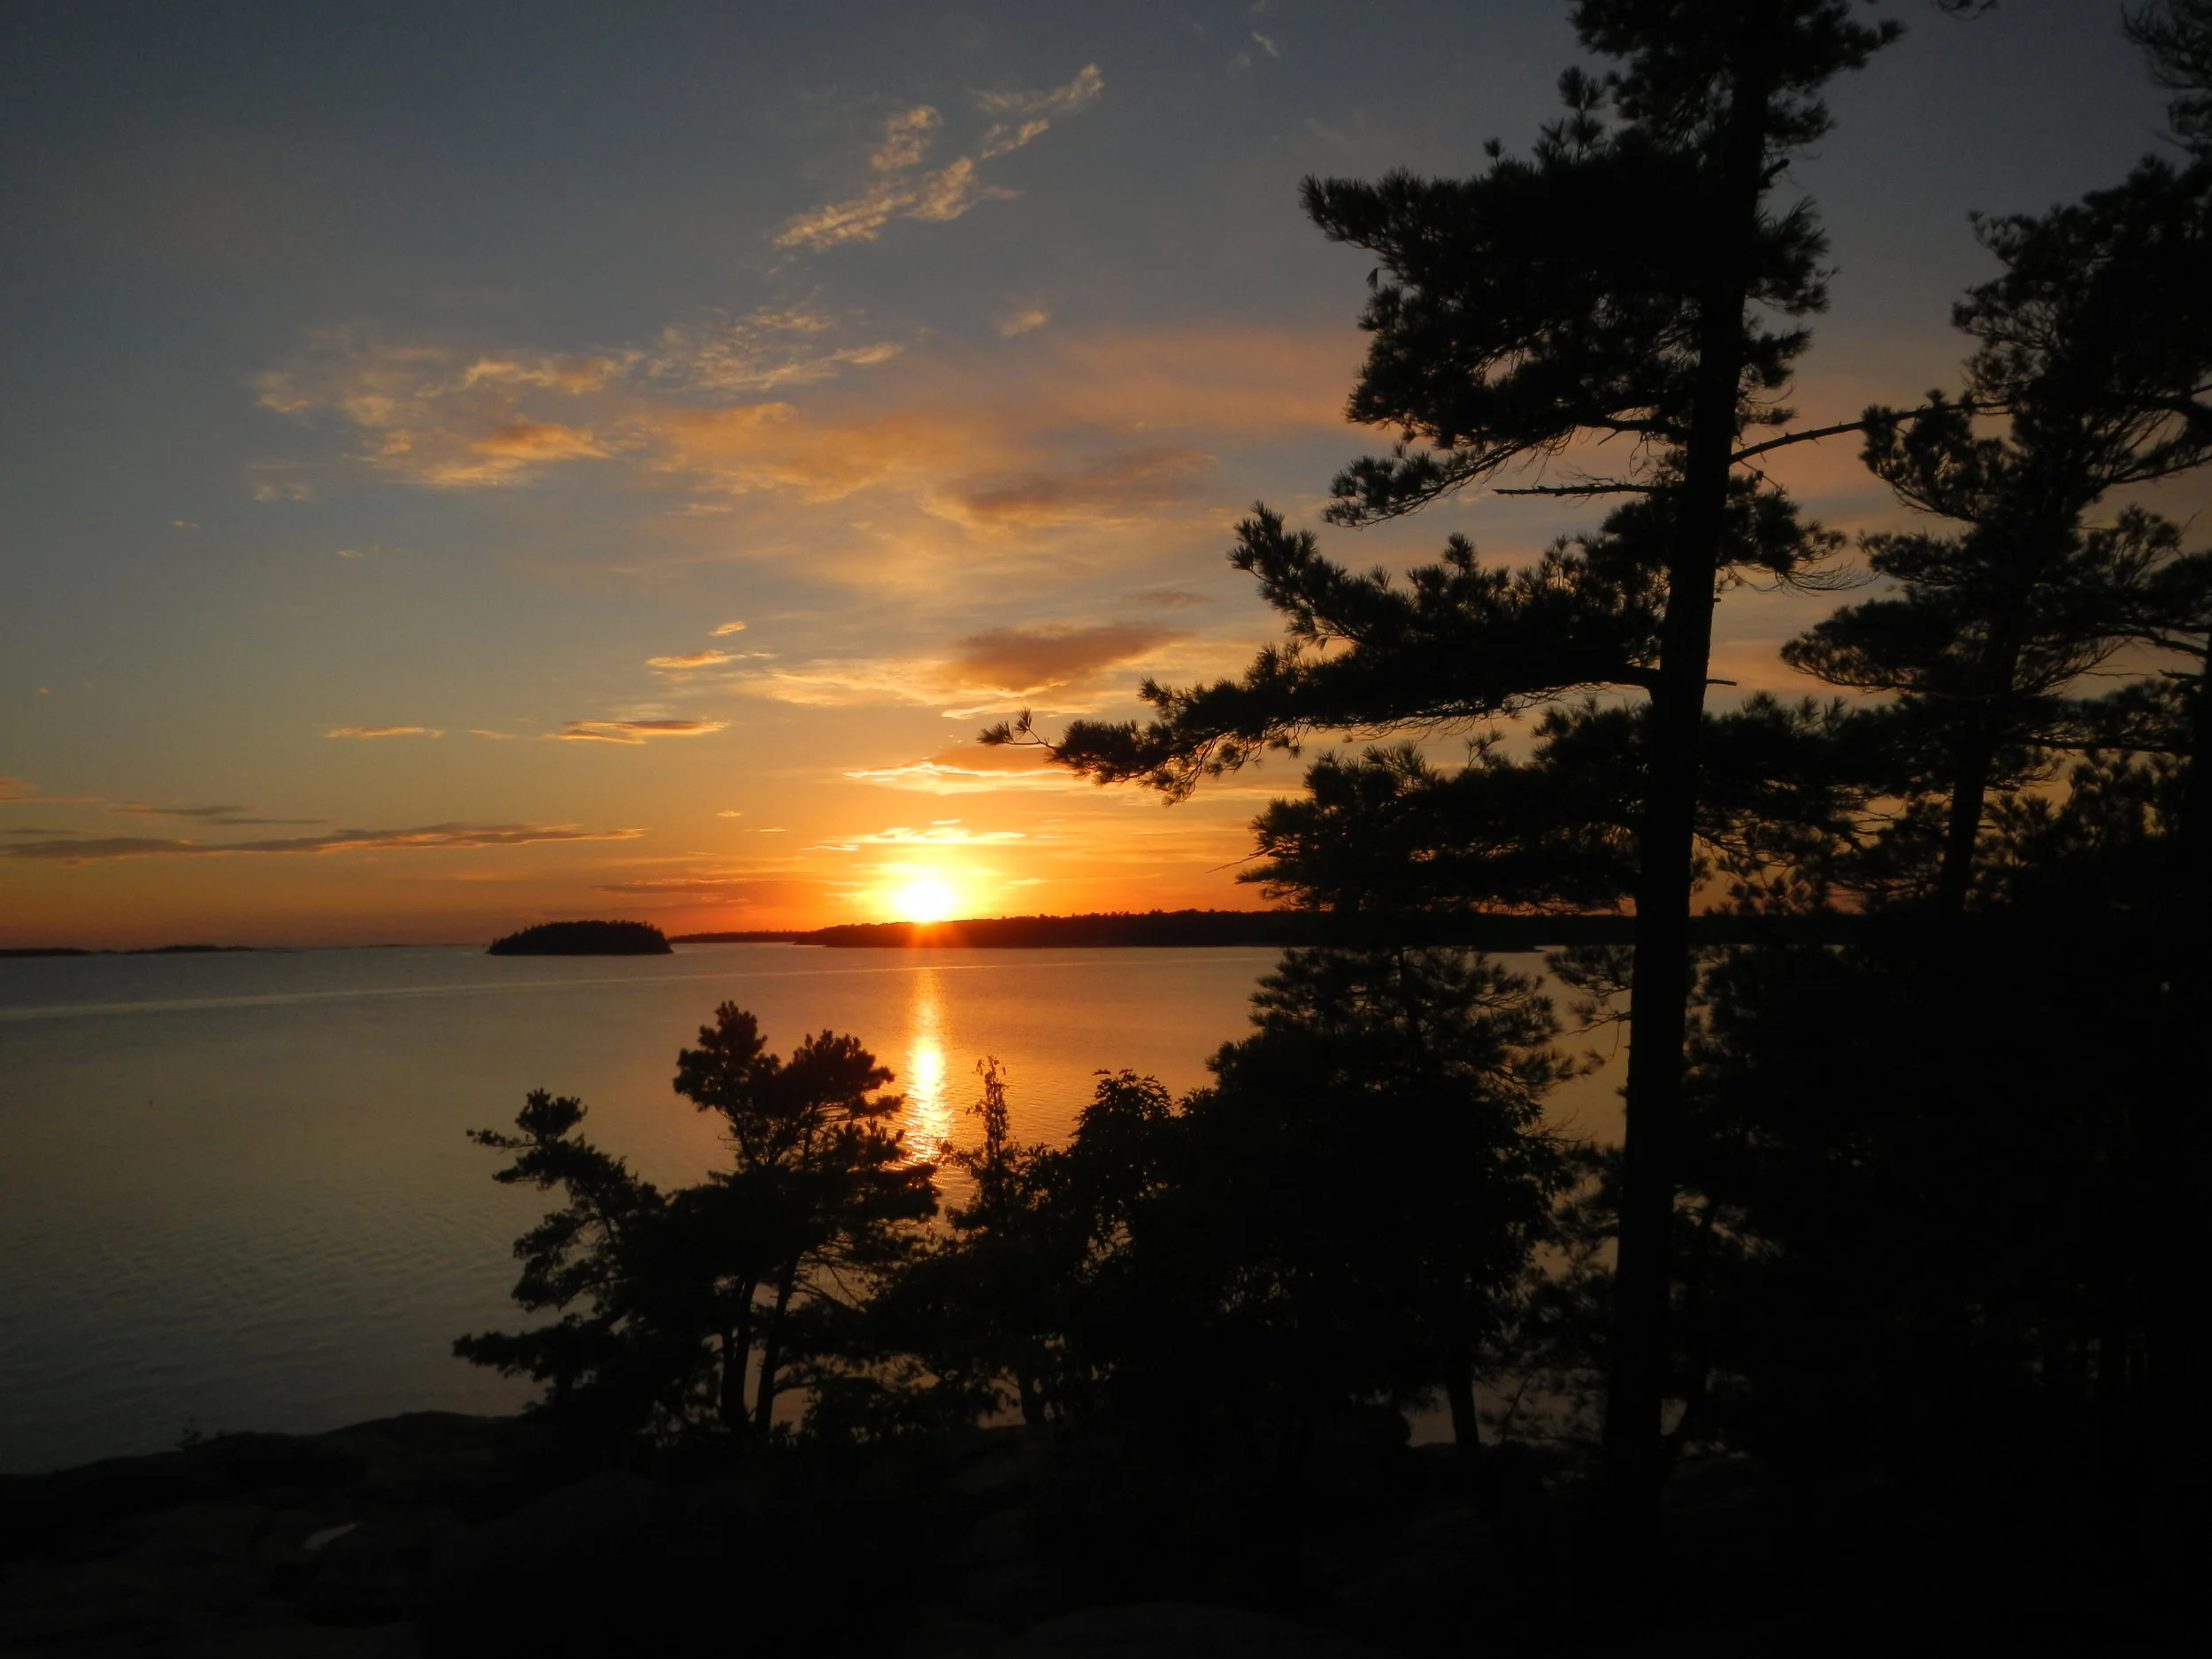
Landscape photography tip:
Photographing landscapes and nature in general, can be incredibly peaceful. I often like to get up early in the morning to catch the sunrise, or wander off by myself to capture the sunset. There are several key things to keep in mind when photographing landscapes. The first one is to make sure you choose a smaller aperture. This will allow you to have a greater depth of field, and therefore, more of your scene will be in focus. Having a smaller aperture will let less light in, so you will have to counter that by increasing your ISO or decreasing your shutter speed. When you decrease your shutter speed, the shutter remains open longer to let more light in. With the shutter open longer, there is a higher chance of having camera shake, which will cause motion blur, so having a tripod is very important.
The tripod with stabilize your camera and allow the shot to be in focus. Another important thing to remember, is to change your point of view. Sometimes you will need to take several photographs of the same thing, but at different angles, in order to get the exact shot you were envisioning. Try shooting from higher angles and lower angles, as well as walking around the subject to get it from a different perspective. Sometimes changing the perspective even slightly can take it from being a good photograph to a great photograph.
Facebook: Jordan Christine Holden
Instagram: Jordan Christine Photography
Photo Tips from the Pros Series: Danielle Scepanovic
Text & Image: Danielle Scepanovic
As I became more familiar with my camera and the basics of photography, I started to push myself to be more creative with my camera lens. One of the easiest ways to do this, I’ve found, is to revisit a place when the sun is leaving the sky or when it’s dark out!
Since I began to spend more time in provincial parks, I pushed myself to go watch the sunset. By doing this, I learned some of the best secrets to capturing a good sunset photo, which you can take even further with friends by playing with silhouettes.
1) Check when the sun is supposed to set that night. This way you can plan your photography adventure accordingly to capture the best moments of the sunset. I prefer to arrive about 30 to 45 minutes before the sunset, but if you don’t have that kind of time, 10 to 20 minutes is okay too. Arriving earlier allows you to set up your camera for the lighting that night, and I find that the longer I sit there with my camera the more interested I become in the emerging colours of the evening sky.
2) Always, always, always stay after the sun has set! Most people tend to leave once the sun disappears from the horizon, but from experience, this is when the sky starts to get interesting. After the sun disappears from the horizon, the light is still shining from the sun, but instead of the sun being the centre of attention, the beautiful cloud shapes are filled with warm tones of orange and yellow, and sometimes even a bright ruby red. I promise you, it is worthwhile to sit with your camera at least 30 to 45 minutes after the sun has officially set.
3) Constantly check your camera setting if you are shooting in manual mode. As the sun journeys from its high point in the sky to below the horizon¸ you will notice that it gets darker, making it harder for your camera to capture the spectacular colours that you are seeing with your own two eyes. Don’t worry! I struggled with this for a while, but I learned the trick: continue adjusting your ISO. Your ISO setting, as well as your aperture, have to continue adjusting to the amount of light in the sky to maximize the ability of your camera’s lighting sensitivity.
The ISO determines how sensitive your camera sensor is to the light – so on a bright sunny day, 100 or 200 ISO is great, but as the light starts to disappear from the sky, you need your camera to be more sensitive to the light in order to capture those beautiful colours. So, as the sun disappears from the horizon, slowly increase your ISO. This will take some practice.
The same idea applies to your aperture settings. Your aperture (F-stop) is the width of your lens opening, and it ranges from F5.4 to F24, for most basic camera lenses. Your camera lenses can be smaller (higher F-stop) in brighter lighting conditions, however, as the sun starts to disappear from the sky, you need to have your aperture lower (wider opening) to work with your high ISO to capture all of the colours that you see in the sky.
You may have noticed that sunset photos take just as much planning as skill – remember this! Also, it’s great to go back to the same place multiple times because you can practice adjusting your camera without your surroundings changing much.
And, if you want to have a little more fun, poking your camera through trees, over a rock, or get your friends and family in front of your camera! Black silhouettes will always make a sunset even more interesting.
Instagram: @newperception
Photo Tips from the Pros Series: Sherri McEwen

Image & text: Sherri McEwen
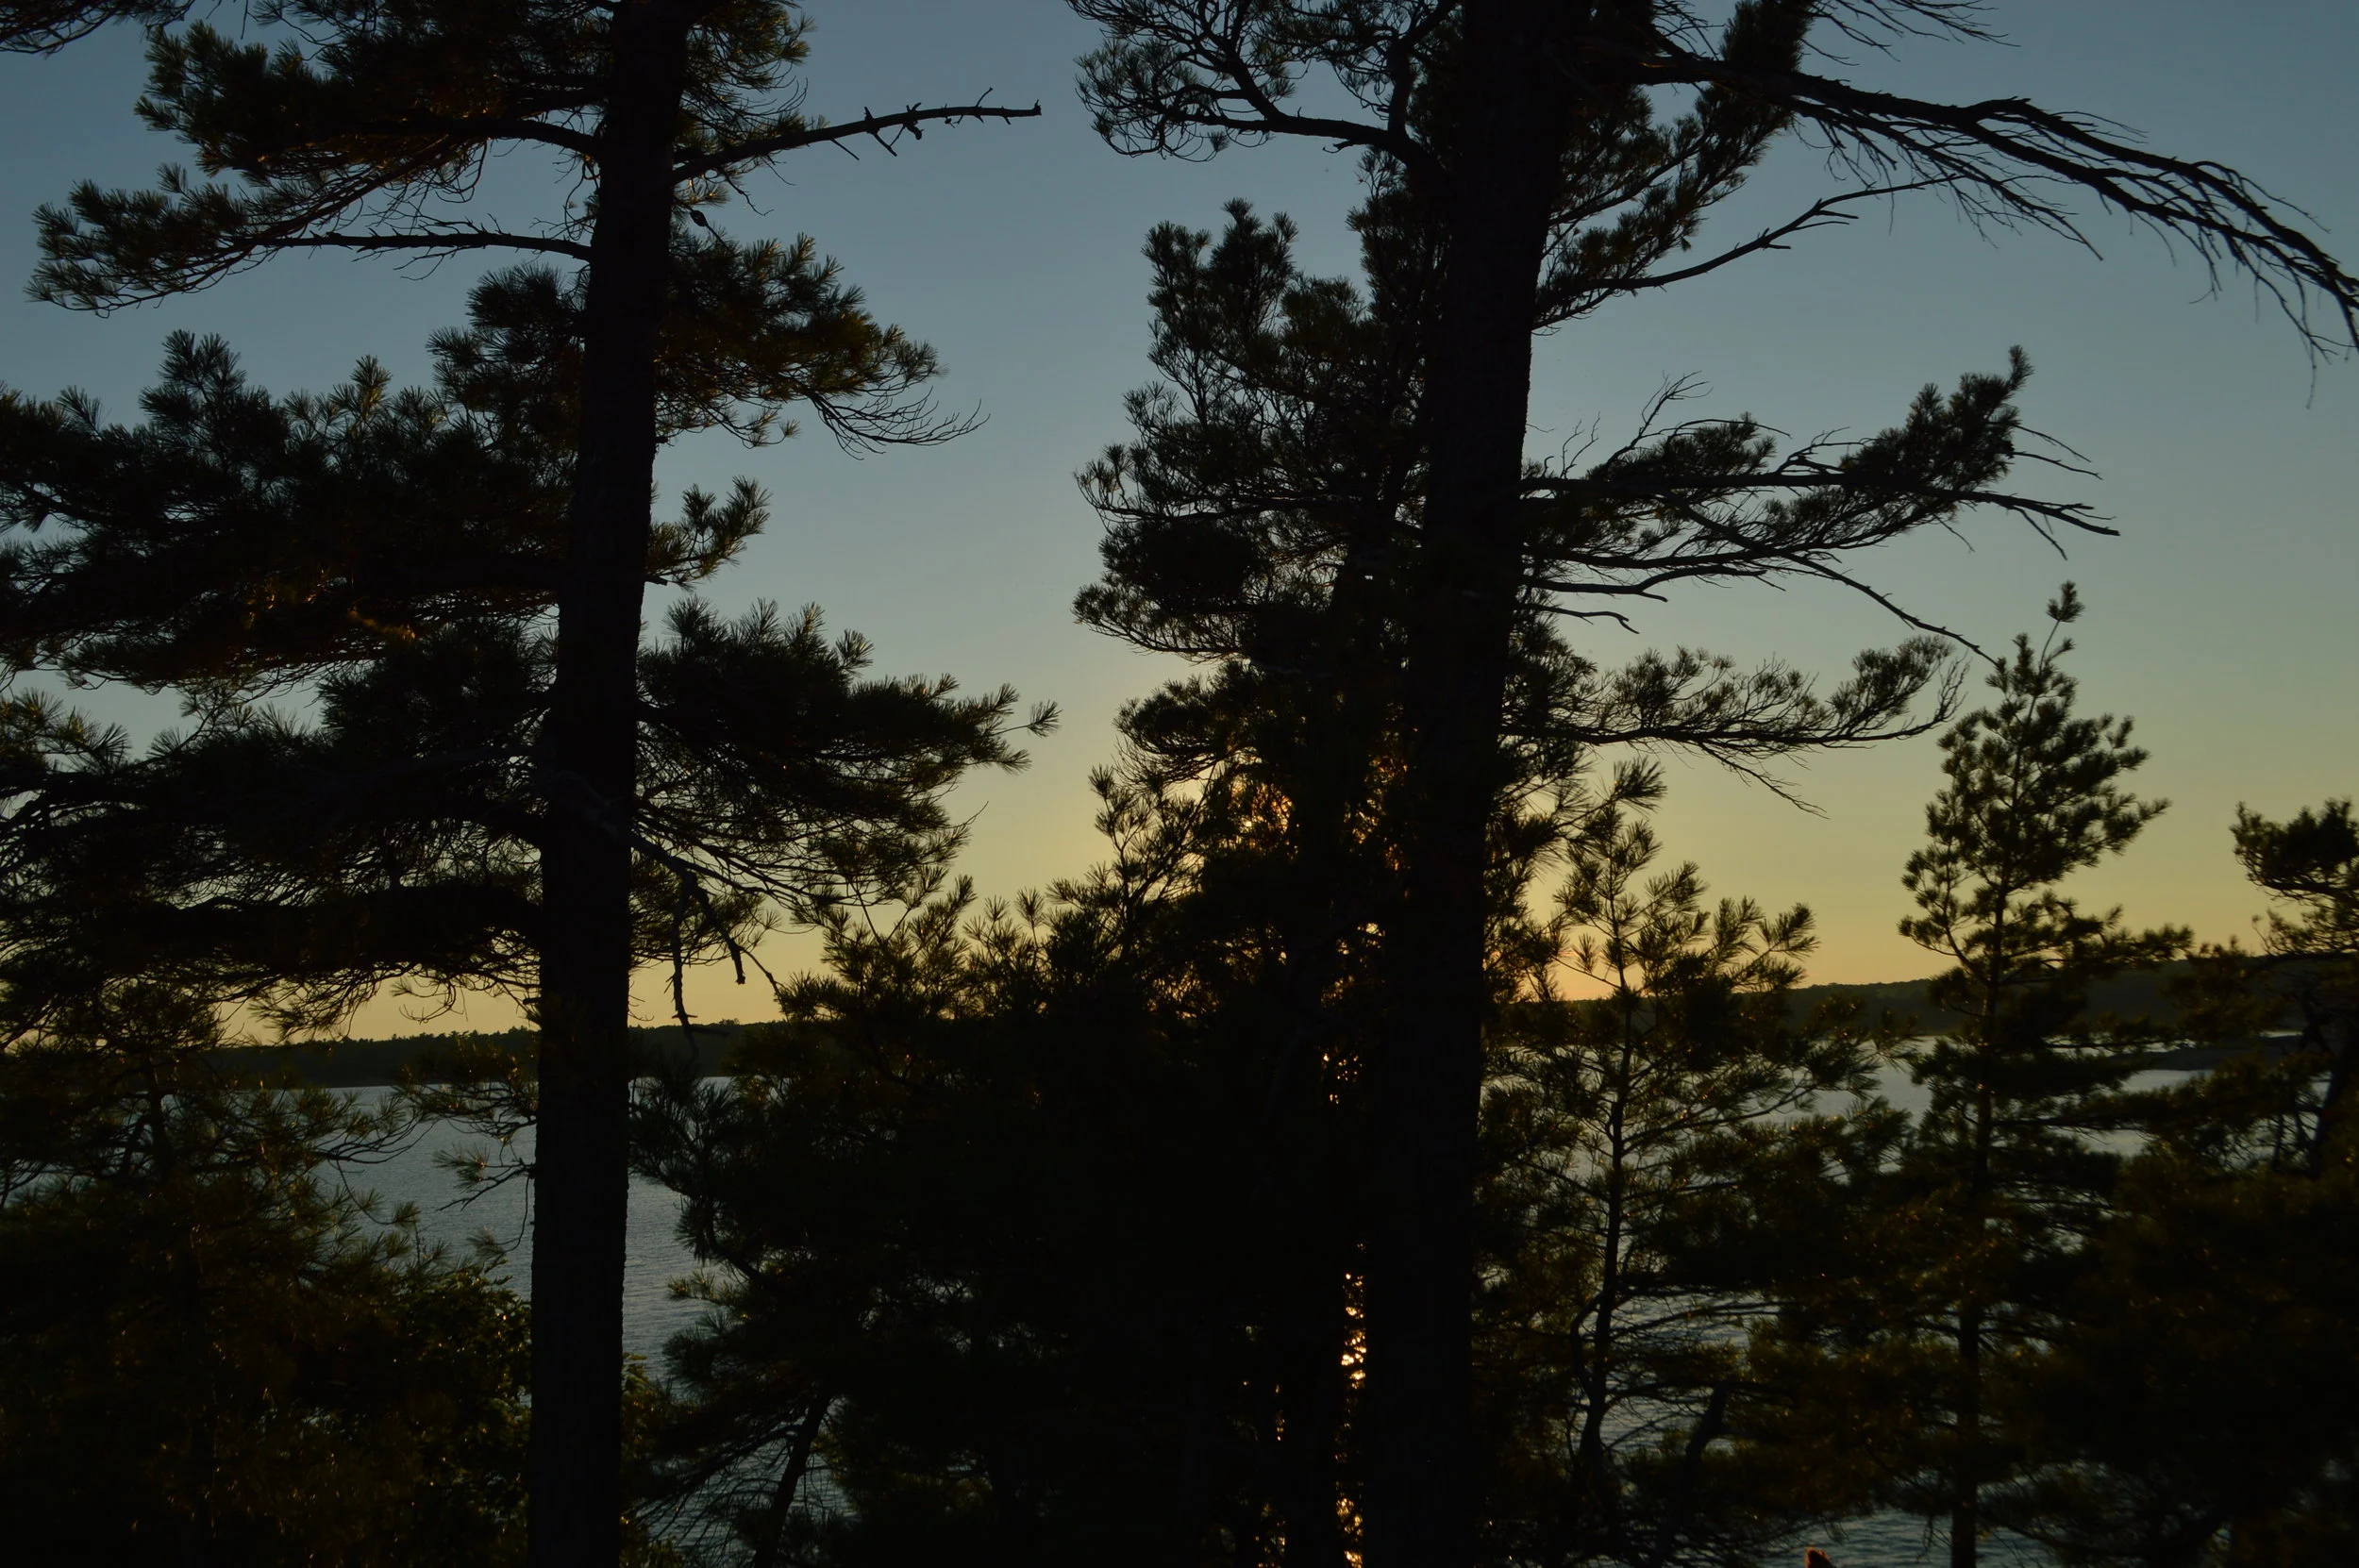
When it comes to landscape photography, one easily forgotten aspect is a straight horizon. You take photos of a scene, later realizing that your horizon is slightly crooked.
At other times, you may photograph a scene in which the horizon is not clearly visible. In these situations, you can still use a point to bring a straight line and balance to your photo. You can focus on a shoreline, for instance, insuring that the shoreline runs a smooth horizontal line across your image.
One thing that I also find to be important is to have an overall balance of "opposites" within your frame. A nice balance of light and dark areas, as well as colour and neutral tones. For example, if you were shooting a field with dense trees in the background, keep the line where the field meets the trees straight and visually place the trees in such a way that you have two larger trees framing your image. By playing with this, it is amazing how a little shift in your field of vision can improve a photo.
All in all, photography is an art. Wherever you go, take note of what is around you. There is art in everything, especially in nature. Sometimes it can be the way two trees have fallen on one another, creating a "sculpture of nature." Sometimes it can be the way the light hits the fog, creating a mood of both mystery and light. Have fun and keep your eyes and mind open to the wonders around you.
Photo Tips from the Pros Series: Dean Verner

Words & Image/Time-Lapse: Dean Verner
Time-lapse Photography, capturing something too slow to see.
Like most, I have always been fascinated by time-lapse photography. Until recently it had always seemed out of reach without spending large sums of money for dedicated equipment and a tremendous amount of personal time. But now with the availability of digital cameras and much improved personal computers, getting impressive results is well within the reach of most.
It is likely that if you have any kind of digital camera (DSLR) and a tripod all that is required is the addition of one more piece of equipment, an intervalometer. Intervalometers will allow the photographer to have the camera automatically capture any number of images, and set the frequency of the images being captured.
I captured this time-lapse image in beautiful Killbear Provincial Park. Here are the details and settings of the image:
Camera: Canon 70D
Lens: Tokina AT-X 116 Pro11-16mm f2.8
ISO: 100; f9.0; 1/2500 sec; Focal Length set to 12mm
Total of 1513 images captured at 3 second intervals
There are quite a variety of other set ups that would also work to capture this image. One that I would like to point out is a smart phone and free apps. The only other requirement would be a stable location for the phone.
Once the images are captured they must be rendered into a video on a PC with rendering software. My favourite software is LRtimelapse, but there many others available, some free.
The results are spectacular. In this time-lapse image essentially 75 minutes of real time have been compressed into 50 seconds. You can see the movement of the sun, clouds moving in different directions according their altitude, sun beams shining through the clouds onto the water, the ice movement along the shore, and the changing colours of the snow.
Facebook: Dean Verner
Vimeo: Dean Verner
YouTube: Dean Verner
ZenFolio: Dean Verner
Photo Tips from the Pros Series: Jason Noack

Image & text: Jason Noack
It's always wonderful encountering wildlife and even more special when that interaction involves eye contact. As a photographer I love those moments when the subjects' gaze meets the camera. However, this alone isn't enough for a powerful image. In order to bring more focus on those eyes I often use a narrow depth of field to bring unwanted elements in the photo out of focus. The depth of field is basically a measure of how much of what you see is 'in focus' and it's a function of distance to subject and aperture and is specific to each lens/body combination. Some of that 'in focus' area is in front of the focus point and some of it is behind the focus point. The depth of field decreases as the size of the aperture increases (F-number decreasing).
This photo is busy with trees, branches and leaves throughout. In order to reduce the attention on those other elements a narrow depth of field was used to soften their impact. Here I opened the aperture wide to F/4 to get a narrow depth of field. Had the aperture been smaller like F/11, for example, much more of the image would have been in focus and the face of the young deer would not have appeared so prominent.
It's important to not only look at your subject but also their surroundings. Often you can remove elements with changes to the composition but when you can't and when those elements aren't the same distance away from the camera as the subject then try reducing the depth of field by increasing the size of the aperture.
Facebook: Jason Noack Photography
Instagram: Jason Noack
Photo Tips from the Pros Series: Cowboy with a Camera
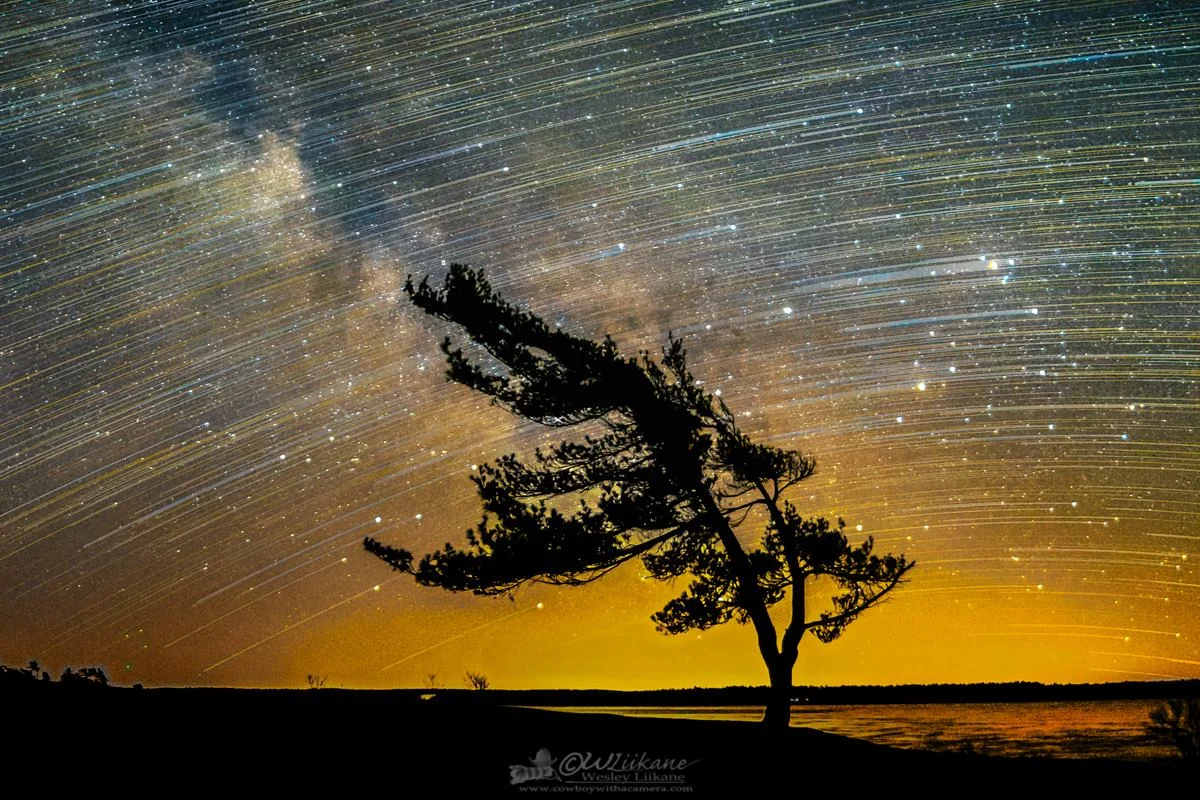
Image Title: Windswept / Image & Words: Cowboy with a Camera
Star trails are something that can be a lot of fun to capture at night. Using an intervalometer or remote shutter you can setup to capture these using several different methods. Firstly you must make sure your camera is setup to be focused on the stars and then you can try capturing the star trail.
The first method you can use to capture star trails is by setting your camera into BULB mode and locking the shutter to take an extremely long exposure using a lower ISO and capturing anywhere from 10 minutes to hours.
The second method is the one in which I prefer to use and that is to capture many exposures and then blend the images in post processing. For instance, this image here was captured using 600+ 20second exposures and then blending them together in a "Lighten" lay mode in Photoshop. Once the star trail was processed I then used one of the single exposure image to get the Milky way to pop out of the image by layering the star trail and one of the single exposure photographs.
With the star trail I lower the opacity until I find the balance that I wanted with the single exposure and star trail combined.
Facebook: Cowboy with a Camera
Photo Tips from the Pros Series: Jo Rogge

Image & Text: Jo Rogge
My tip is simple make photography fun!
Even when you are faced with not having the right gear handy take the shot and do not worry about opportunity missed! There will be a next time and remember that the best photograph is the one you have not taken yet.
I also encourage you to share your images and see the reactions you get. It is a great indicator how your skills are progressing!
Image description: The Ice break-up at Killbear Provincial park during Maple Syrup Day.
Facebook: Parry Sound District Photo sharing Site
Photo Tips from the Pros Series: Thom Morrissey
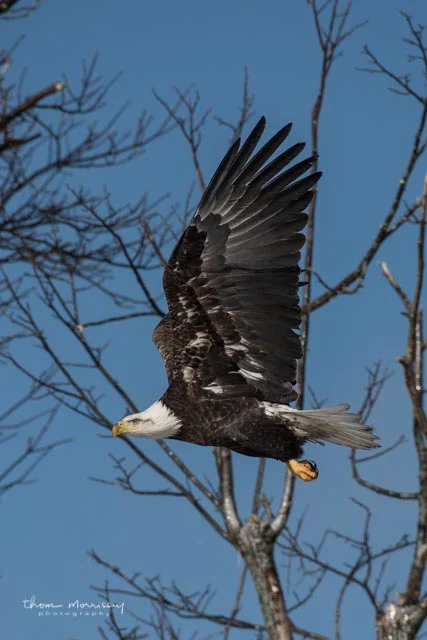
Words & Image: Thom Morrissey
One thing I try to do when I'm cruising for photos is to have my camera settings ready to go for whatever I'm looking for: animals especially. Having the long lens on, camera settings to continuous shooting, proper aperture and a high enough shutter speed that I can hand-hold the camera are things I try to do.
Have I ever missed a shot because I haven't remembered to turn the self-timer off? You bet I have!
Facebook: Thom Morrissey Photography
Photo Tips from the Pros Series: Oleksandra Budna
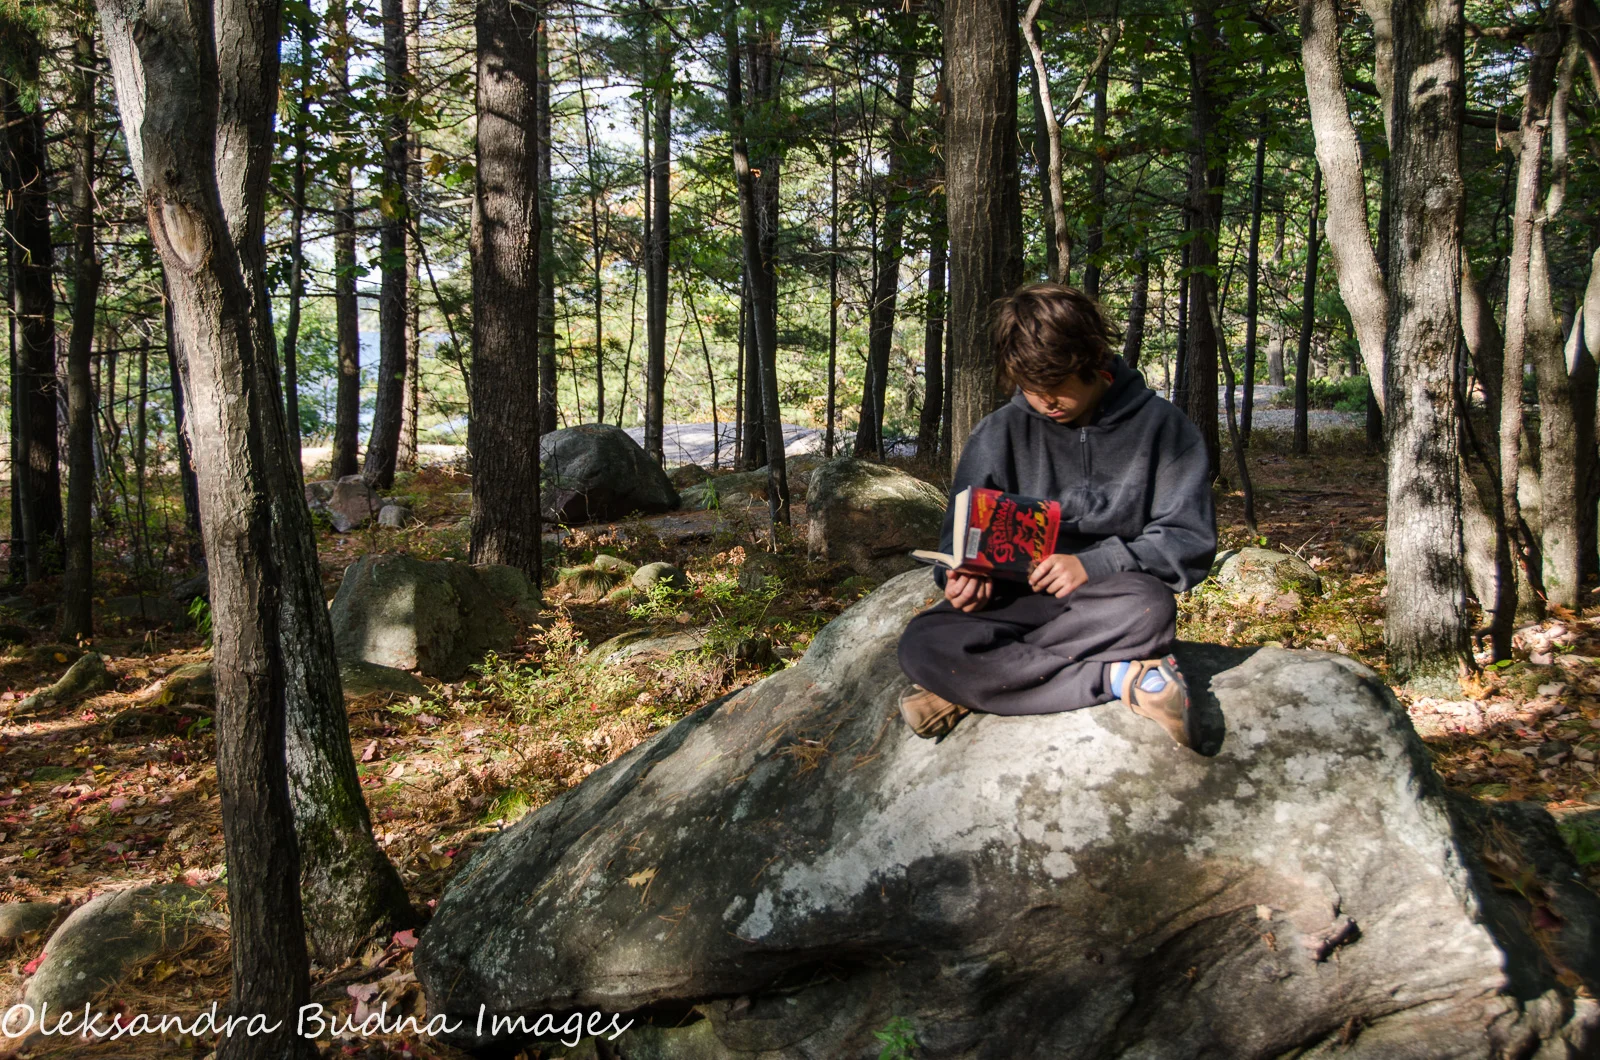
Words and Image: Oleksandra Budna
What story does your picture tell?
We all love a good picture, and with modern technology taking photos has never been easier. But what makes for a good photo? Yes, there are some technical aspects to it and having decent equipment helps but it is in no way necessary. To me, a good picture is about capturing the feeling of the moment, inspiring imagination and most importantly, telling a story. And yet, time and again on our travels, I see people with their backs to the most breathtaking landscapes, wielding selfie sticks, trying to squeeze themselves into a frame; or neatly lined against gorgeous backdrops with posed smiles waiting for someone to photograph them. The only story those pictures tell: I’ve been there. They work well for your Facebook feed but are hardly the photos you will want to go back to weeks, months or even years later.
I have always been interested in capturing people interacting with nature rather than using it as a background. The memories I cherish the most are those of my son paddling a canoe, my husband enjoying the view after a strenuous hike, my kids holding hands on the trail, the joy of splashing in the water, the awe at the beauty of the setting sun. And those are the moments I try to document whenever we go outside. It makes for happier kids too. Instead of having to stand still and wear a forced smile, they can run around and be themselves.
It doesn’t mean that you should completely ban posed photos from your repertoire. They can tell some interesting stories if done with intention instead of serving as a mindless proof of visiting a place. We were once asked to photograph a large group of cyclists on Savannah Trail in Pinery Provincial Park. As they were arranging themselves in rows, they explained they had been taking the same picture every year for the past fourteen years. That must be a neat series of photos.
So how to best capture those special moments?
- Be patient, observant and always ready to spring into action. Special moments can’t be predicted and even if you try to recreate them later, the mood won’t be the same.
- Have a large memory card and take multiple shots. The more photos you take, the better is your chance of capturing that perfect moment.
- Try different vintage points: get up high, bend down low, get to your kids level, or try lying on the ground. In addition to capturing some interesting shots, you will get to experience the world in a new way.
- Use fast shutter speed and continuous shooting mode, if possible, when photographing quick action, like diving off the rock or jumping in the air. It will help freeze the moment and avoid a blur.
- Use a zoom lens. It will allow you to take photos from a distance without disrupting the moment. That being said, don’t use digital zoom on your phone. All you will get is a highly pixelated image.
- If you do decide to take posed photos, get creative. Make silly faces, jump in the air, show how happy, excited or even tired you are. Also remember your face doesn’t need to be in the frame for a memorable photo. Sometimes your feet, shadow or reflection is all you need.
- Finally, have fun and don’t be afraid to experiment and try new things. After all, it is your story and it should be as unique as you are.
Twitter: @LesyaBudna
Photo Tips from the Pros Series: Stephen Elms

Words & Image: Stephen Elms
1. When shooting low light situations it is crucial to keep your camera from moving as much as possible. Lower light levels means that your camera has to have a longer shutter speed in order to capture the appropriate amount of light. Hand holding a camera in low light situations will usually lead to blurry images as your camera moves. Even the slightest bit of movement will result in a blurry image. A sturdy tripod is a good investment that will help ensure your camera does not move.
In order to get tack-sharp images in low light it is also important not to touch your camera while the image is being taken. This can be accomplished by using a remote trigger release or by switching your camera into timer mode. You can set the timer for a few seconds, press the shutter release and then take your hands off the camera. This will also help minimize the movement in your camera.
2. When shooting at night or in cold/damp conditions, moisture can accumulate on your lens, ruining your photo. This is especially frustrating when taking long exposures (like the star trail image below). One trick that can help mitigate this moisture build-up is to use one or two disposable hand warmer packets and secure them to the outside of your lens with a rubber band.
Keeping the warmers as close as possible to the glass portion of the lens will ensure your glass stays dry, and might save an image that would have otherwise been ruined by water droplets or moisture.
Instagram: Elms Nature
Photo Tips from the Pros Series: Ryan Adams

Words and Image: Ryan Adams
Special moments happen....
I've always followed what I call the 2 Ps: Patience and Preparedness. You need to let nature and wildlife do its thing and get comfortable with your presence, once that happens they go about doing their thing and You can get really special images.
You also need to be prepared every second to shoot, camera on and settings dialed in so when those special moments happen you're not fumbling around and miss things.
Photo Tips from the Pros Series: Josie Dinsmore

Words and Image by Josie Dinsmore
A great tip that I would like to share is something that I do all the time when I visit Ontario Provincial Parks and other outdoor areas. I especially did this a lot when I visited Killbear Provincial Park for the first time!
My tip is to explore...
When you visit an awesome place, such as Killbear Provincial Park, you could visit all of the most popular scenic spots and probably get some amazing photos. And that's great, but your photos could end up looking like the thousands of photos that other people have taken at that same spot. So take some photos of the famous landscapes and then explore a little. Walk around: a little further away from the popular spots. Walk behind rocks, around bushes, underneath trees, look all around and up and down; take your shoes off and walk into the water along the shoreline, and just explore.
You never know what amazing photos you could take of something or a landscape, just beyond the popular spots!
...And experiment!
Don't just walk up to something or a landscape that you want to take a photo of--try moving around a little. Try a close-up shot or a wide angle shot. Place the subject in the center of the photo or maybe off to one side, get down low and look up; go to higher ground and look down, move around for a different perspective.
Sometimes a great photo can become spectacular by just slightly changing the direction in which you are taking the photo!
Facebook - Josie Dinsmore Photography
Twitter - @Josie_Dinsmore
Instagram - @josiedinsmorephotography
The Beauty of Killbear
Lynn Johnstone
Thousands of visitors and campers have been coming to Killbear Provincial Park for decades. For many, it has become a tradition to come with friends and family. The beauty of Killbear lies with its distinct beaches, varied wildlife and breathtaking scenery. Killbear is renowned for its countless camping areas, great hiking trails and it is simply a dream for both professional and amateur photographers alike to capture stunning photos!
Although camping season is coming to a close at the end of this month (October 29th to be exact) it has been a very busy and active 2017 season for Killbear. There have been many great events, concerts and talks throughout the spring and summer months. The Friends of Killbear will continue to help continue building programs with the Park to entertain, delight and educate our campers and visitors.
So if you haven't visited Killbear Provincial Park please take the time to check out our site as well as Killbear section at Parks Ontario. Please follow us on Facebook and Twitter. And look for yourself all the awesome things that you can do and discover when you either visit or camp at Killbear. It will be an unforgettable experience that you will never forget.